34
On Valentines Eve PapaBear asked me about going out for Sushi for our Valentines Day dinner date, having already planned out a special dinner here at home that would include all 4 of us Bears I had to rethink. By time 4 pm rolled around I was still having trouble coming up with something that both my young bears would eat. BabyBear is as fussy as they come and so with that comes a stress when cooking for just the 2 of them. The nice thing about BabyBear recently is that she has added tomato sauce to her repertoire of food, meaning; she will now also eat cheese pizza. To most of you out there this will not be that big of a deal but from a family who's youngest lives off of peanut butter sandwiches, grilled cheese, oatmeal, yogurt, toast, pasta(plain with Parmesan), potatoes with Gravy, bagels with cream cheese and cereal...cheese pizza is a blessing. I decided to take advantage of this new found food option and go with homemade pizza for them. With time running out for me to have this done and myself ready to go in time I went on the hunt for a QUICK NO RISE PIZZA DOUGH...not too much to ask right? Well apparently not according to Katrina over at Kitchen Trials.
I decided to give this recipe a try, fingers crossed it would turn out as I was on limited time to fix it if needed. I will tell you...NO fixing was needed. In fact it was so perfectly, delicious that I used this same recipe again last night for another round of pizza so we could use up the remaining pepperoni.
Want to make some of your own? Let's get started...
2 1/4 Tsp Yeast 1 Tsp White Sugar 1 Cup Warm Water (110º) 2-2.5 Cups Flour (Regular or Bread, White or Whole Wheat) 2 TBSP Olive Oil 1 Tsp Salt
Begin by preheating your oven to 450º with your rack placed in the middle position. If you are like me and don't have a pizza stone then feel free to put in an upside down cookie sheet in its place while the oven heats up.
With your oven heating, time to mix the yeast, in a medium bowl dissolve the yeast with the sugar in warm water.
The easiest way to check if your water is up to temperature is with a meat thermometer stuck in to the running tap water...hold it there until you see it reach 110º. You want your water no colder or hotter than this temperature, otherwise you will ruin your yeast by either not activating it at all or cooking it completely...stick with 110º and you will be fine. Once it is dissolved allow your yeast, water and sugar to sit for 5 minutes.
Ding! 5 minutes is up...time to toss in your flour, salt and olive oil...beat with your mixer until the dough looks flaky. Start with only 2 Cups of flour...if your dough is too sticky then add in the remaining 1/2 Cup...if not then reserve your 1/2 Cup for sprinkling on the counter top at roll out time.
When I first made the dough on Feb 14th...I only used 2 Cups in the dough and the rest for the counter...when I made it again last night I found that I needed all 2.5 Cups in the dough and more for the counter so it all depends on the humidity of the day I suppose.
Once your dough is all mixed together, you can knead it in to a ball and leave it to rest for 5 minutes, while you prep all of your pizza toppings.
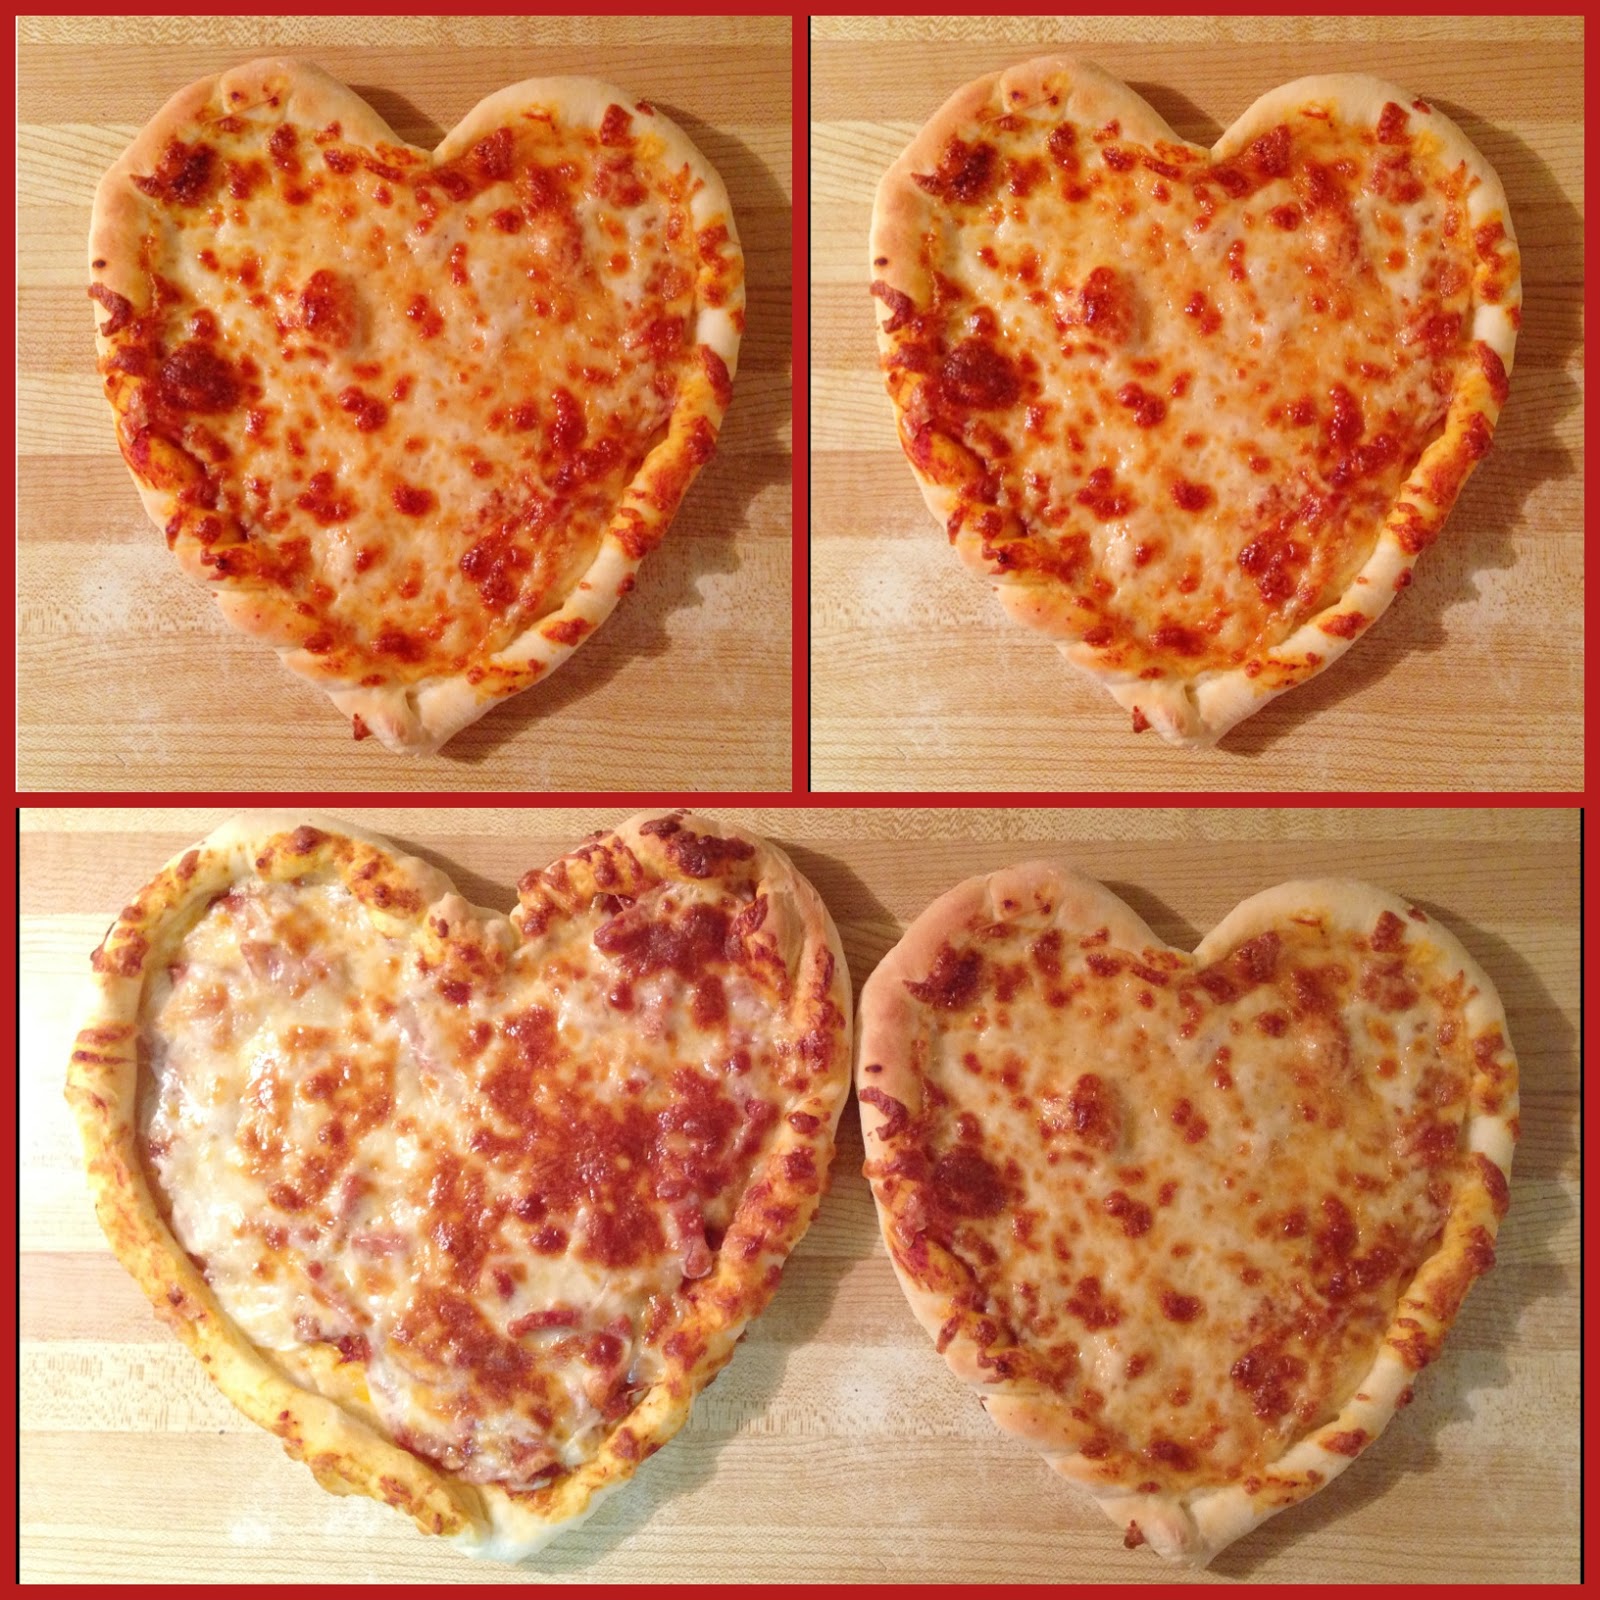
With your toppings prepped and your dough rested...time to roll. Place your dough on to a lightly floured counter top and roll it out to your desired shape and size. I created 2.5 mini pizzas from this one recipe...enough to feed PapaBear, JrBear and BabyBear last night. On Valentines Day I shaped them into 2 hearts with a touch of dough leftover, which I used up in last nights batch after storing it in the fridge in a ziploc bag.
Once you have reached your desired size and shape...roll up the edges all the way around just enough to give yourself a puffy, pizza crust. At some point I plan to roll some cheese into the crust ...or some other filling for an even more delicious pizza crust...Ooh, how about some cinnamon and sugar in the crust for a dessert pizza...sounds delicious but that update is for another day.
Toppings time...we used tomato sauce, pepperoni and mozzarella cheese, but you feel free to get creative and top those shells up however you please.
A pizza pose after all your hard work is definitely a must.
Pop them in to the oven for 15- 20 minutes...the cook time will definitely depend on your oven. I find that here we baked them for 15 minutes and then put them under the grill to brown the cheese for the remaining 5 minutes. My best advice is to just watch them closely so they don't burn as all cooking times in different ovens may vary. In any situation you are looking for browning, bubbling cheese and a light brown crust...Upon removal from the oven, let your pizza rest for 5 minutes before cutting and serve.
DELICIOUS!... and like Katrina says...from prep to bake ready in 35 minutes...less time than it takes to have it ordered and delivered to your door. Not to mention it tastes so much better than any delivery and is probably way healthier too.
Enjoy!
Now Go Be Brave...and surprise your family with some homemade pizza today.