
Then it found me...the perfect recipe for homemade tortillas. I was in heaven and my mouth was watering just looking at the pictures on Smells Like Home. I knew I had to make them and see if they tasted as good as they looked. I can tell you that they do in fact taste as good as they looked...so much so that JrBear has been requesting that I make more. Ready to make some of your very own tortilla's? Let's get started then...
Homemade Tortilla's
3 Cups Flour
2 Tsp Baking Powder
1 Heaping Tsp Salt
5 TBSP Shortening
3/4 Cup Warm Water
Start by mixing together all your dry ingredients in a large bowl. To that you will add in your Shortening (Unsalted Butter can be used in place of this if you like) and cut together with a pastry cutter.

At this point I poured in the water a bit at a time, mixing and cutting the ingredients together with my pastry cutter to get them all incorporated with each other. The idea is that all your dough comes together into a nice little ball that is soft but not too sticky. If you are finding your dough to be a little more sticky than what is required, add in some flour a bit at a time until it forms a nice slightly sticky ball.

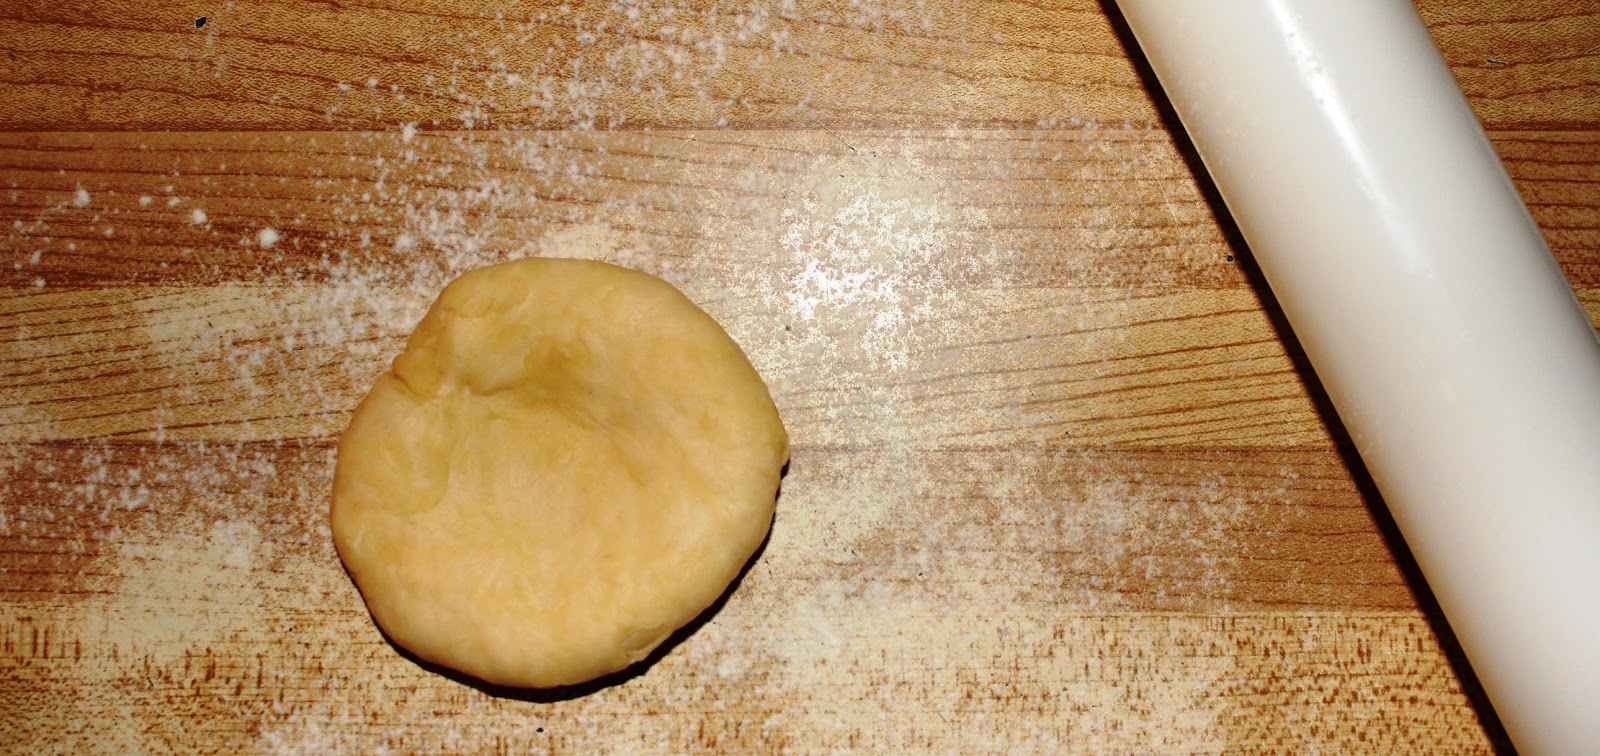
Place your ball of dough on a well floured counter and divide it into 12 equal portions. 12 equal portions will give your the mini tortilla's...if you are looking for the larger sized ones you will need to only divide the dough in to 6 equal portions. This step is all about preference and may take a time or two of trial and error before you get the size you want. Once you have your dough portioned out, cover the balls with a clean tea towel and leave them to rest for 10 minutes.

During their last 2 minutes of resting, you will need to heat a frying pan over medium-high heat. Then one at a time roll your little dough balls into a flat tortilla. Tara's tells us that we should not only keep the dough balls covered until we are ready to roll each one but to only roll one out at a time. This way we will avoid the dough drying out.
Lay your first tortilla into the HOT frying pan and cook each side for no more than 40 seconds...this part will vary by stove top. What I can tell you is to keep a close eye on your cooking tortilla as they can and will burn easily. One thing to look for as they cook is little bubbles that will form on the side that is touching the heat...they will start to brown and that is a good time to flip them over or remove from the pan...depending on which side you are cooking.
While you have one tortilla in the pan, you can roll out your next tortillas for cooking.
Keep all your cooked tortilla's covered in a damp tea towel to keep them warm and pliable until you are ready to use them. If you have leftover tortilla's they will keep quite nicely in a large zip loc bag for at least 5 days and can be used in a variety of recipes or just eaten dipped in a bowl of salad dressing...MMMMmmm so good!!
 |
| As you can see I am still figuring out when to flip them for my stove...regardless they were delicious. |
Make sure to check back later this week for a DELICIOUS recipe that you can make with your fresh Tortillas.
Now Go Be Brave...and create your OWN tortilla's today...Say NO! to store bought cardboard.
Saw your link on Craft-O-Maniac Monday. Your tortillas look delish. My post is #389:)
ReplyDelete@Reecea Henderson ... Thank-you for taking the time to come on over. I am not sure if I looked at the correct link up from you as your blog did not match up with #389 ...I think they shift the links around so not everyone that links up first is in the top spot. Regardless, I LOVE your Lace idea...thank you so much. That tip will come in EXTREMELY handy for my latest works of wearable art:D
DeleteLooking forward to making these........I bet they are so good.
ReplyDeleteThank you for sharing with the Clever Chicks Blog Hop this week; I hope you’ll join us again!
Cheers,
Kathy Shea Mormino
The Chicken Chick
http://www.The-Chicken-Chick.com